To take a screenshot on your laptop, the method depends on your operating system. On Windows, press the Print Screen (PrtScn) key to capture the entire screen or Alt + PrtScn for the active window; the image is copied to the clipboard, ready to paste.
Use Windows + Shift + S for a snipping tool to select specific areas. Press Shift + Command + 3 on Mac to capture the whole screen or Shift + Command + 4 to select an area.
On macOS, screenshots are saved to your desktop by default. For Chromebooks, use Ctrl + Show Windows (a rectangle with lines) for the full screen or add Shift for partial selection.
Dedicated apps like Snipping Tool (Windows) or Preview (Mac) offer more customization.
Method 1 — Using Windows
1. Press Win+PrintScreen to save the screenshot directly to a file.
Here are the steps for taking a screenshot using Win + PrintScreen on a Windows computer, in points:
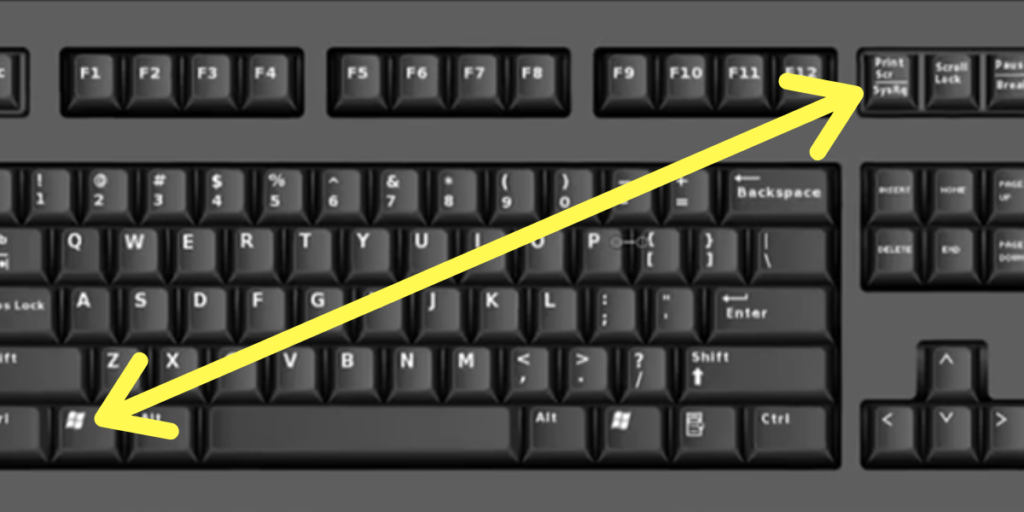
- Press the Windows key (Win) and the PrintScreen key (PrtScn) at the same time.
- The screen will briefly dim to indicate the screenshot has been captured.
- The screenshot will be saved automatically as a PNG file.
- Navigate to C:\Users[YourUsername]\Pictures\Screenshots to find your screenshot.
- Screenshots will be named Screenshot (number ).png, with numbers incrementing for each one.
Recently Post: How to Add AirPods to Any Device
2. Press Alt+ Win+PrintScreen to take a screenshot of the active window only.
The Alt + Win + PrintScreen combination doesn’t take a screenshot of the active window. Instead, here’s how you can take a screenshot of the active window:
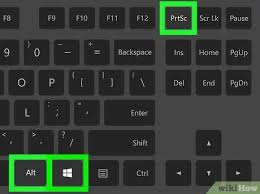
- Alt + PrintScreen: This captures only the active window and copies it to the clipboard. You’ll then need to paste it into an image editor like Paint or any document editor.
To automatically save the screenshot of the active window, you would need to press Win + Shift + S, which opens the Snipping Tool where you can select the active window or specific areas for a screenshot.
3. Take a full-screen screenshot in Windows 7 or Vista
To take a full-screen screenshot in Windows 7 or Vista, follow these steps:
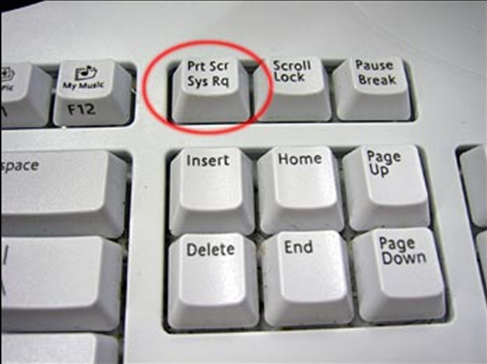
- Press the PrintScreen (PrtScn) key on your keyboard.
- This captures the entire screen and copies the screenshot to the clipboard.
- Open an image editing program, such as Paint:
- Click on the Start menu, type Paint, and open it.
- Paste the screenshot:
- Press Ctrl + V or right-click and choose Paste to paste the screenshot into Paint.
- Save the image:
- Click on File > Save As, choose a location, and save the screenshot in your preferred format (e.g., PNG, JPEG)
Suggested Post: How to Use DeX?
Method 2 — Using Mac
1. Press Command Shift+3 to take a full-screen screenshot
On macOS, pressing Command + Shift + 3 takes a full-screen screenshot. Here’s what happens when you use this shortcut:
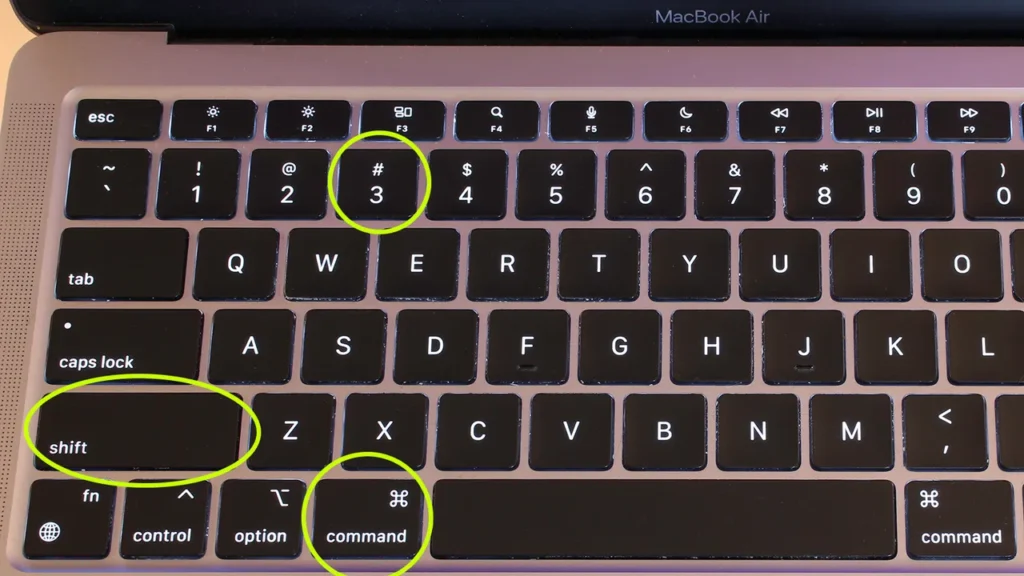
- Press Command (⌘) + Shift (⇧) + 3 simultaneously.
- The full screen is captured immediately.
- The screenshot is saved directly to your desktop by default as a PNG file.
- The file is named something like “Screen Shot [date] at [time].png”.
2. Press Command(⌘)+ Shift+4 to capture part of your display
On macOS, pressing Command (⌘) + Shift (⇧) + 4 allows you to capture a specific part of your screen. Here’s how it works:
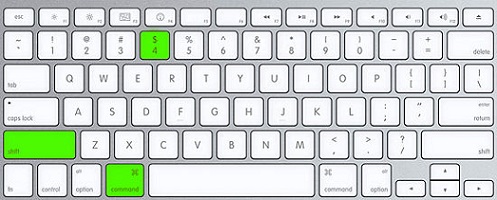
- Press Command (⌘) + Shift (⇧) + 4.
- Your cursor will change to a crosshair.
- Click and drag to select the area of the screen you want to capture.
- Release the mouse or trackpad button to take the screenshot.
- The screenshot is saved as a PNG file on your desktop by default.
- The file is named something like “Screen Shot [date] at [time].png”
3. Press ⌘ Command⇧ Shift+4+Spacebar to capture a specific window
On macOS, pressing Command (⌘) + Shift (⇧) + 4, followed by the Spacebar, allows you to capture a specific window. Here’s how to do it:
- Press Command (⌘) + Shift (⇧) + 4.
- Your cursor will turn into a crosshair.
- Press the Spacebar. The cursor will change to a camera icon.
- Hover over the window you want to capture (it will be highlighted).
- Click the window to take the screenshot.
- The screenshot is saved as a PNG file on your desktop.
- The file is named something like “Screen Shot [date] at [time].png”.
How to Screenshot on Your Laptop Using Windows 11 and Windows 10
Method 1: Print Screen Key
The Print Screen (PrtScn) button is one of the simplest ways to capture your screen in Windows 11 and Windows 10. Here’s how you can use it effectively:
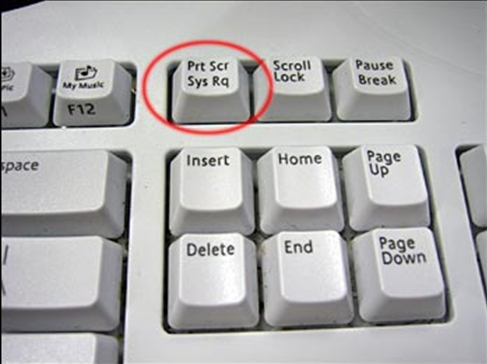
- Full Screen Capture:
- Press the “PrtScn” key to capture the entire screen.
- Open an application like Paint or a document editor.
- Paste the screenshot using Ctrl + V.
- Auto-Save Full-Screen:
- Press Windows Key + PrtScn to take a screenshot and save it automatically to the Pictures library under “Screenshots.”
Method 2: Snip & Sketch Tool
For more control and precision, the Snip & Sketch tool is your go-to:
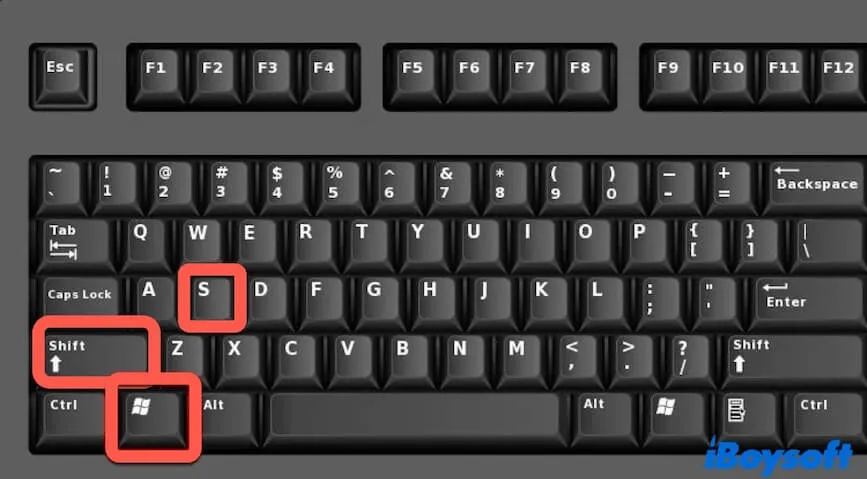
- Open Snip & Sketch by pressing Windows + Shift + S.
- Choose your snip type from the toolbar.
- Select the area you want to capture.
- The screenshot is copied to your clipboard and can be annotated within the Snip & Sketch app.
Method 3: Alt + Print Screen for Active Window
To capture only the active window without additional background clutter:
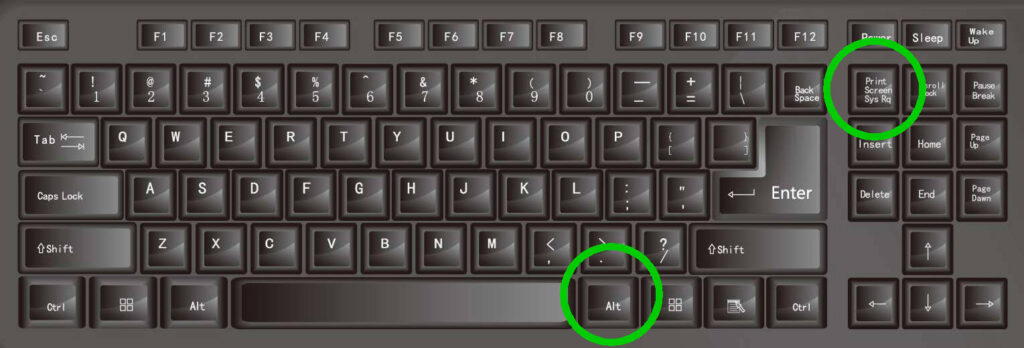
- Press Alt + PrtScn.
- Paste the capture into an image editor or document using Ctrl + V.
- Save the file as needed.
Conclusion
Screenshots are an essential tool for anyone using a laptop, whether you’re a student, professional, or casual internet user.
By mastering the art of capturing your laptop screen, you enhance your ability to share, save, and organize digital content efficiently.
With the methods outlined above, you now understand how to take screenshots on Windows 10 and Windows 11 laptops.
FAQs
How do I find my screenshots after taking them?
Screenshots taken using “Windows + Print Screen” are saved in the “Screenshots” folder in your Pictures library. For other screenshots, you’ll need to paste them into an application like Paint and save them manually.
What do I do if my Print Screen key doesn’t work?
Ensure the “Fn” key isn’t required in conjunction with “Print Screen.” If issues persist, check your keyboard settings or try using software tools like Snip & Sketch.
Can I take a screenshot of a specific area?
Yes, using “Windows + Shift + S” in Windows 11 or the Snipping Tool in Windows 10, you can select and capture specific areas of your screen.
What is the best screenshot tool?
The best screenshot tool depends on your needs, but Snagit is great for advanced editing and annotation, while ShareX is free and powerful for Windows users. For simplicity, built-in tools like Snipping Tool (Windows) or Command + Shift + 5 (Mac) work well.

1 thought on “How to Screenshot on Your Laptop (Easy Steps for All Devices) 2024”